Description:
This article describes how static IP parameters can be assigned to an access point with LCOS via the LANCOM Management Cloud (LMC).
Requirements:
- LCOS as of version 10.50 (download latest version)
- Access to the LMC including your own project
- Any web browser for accessing the LMC
Procedure:
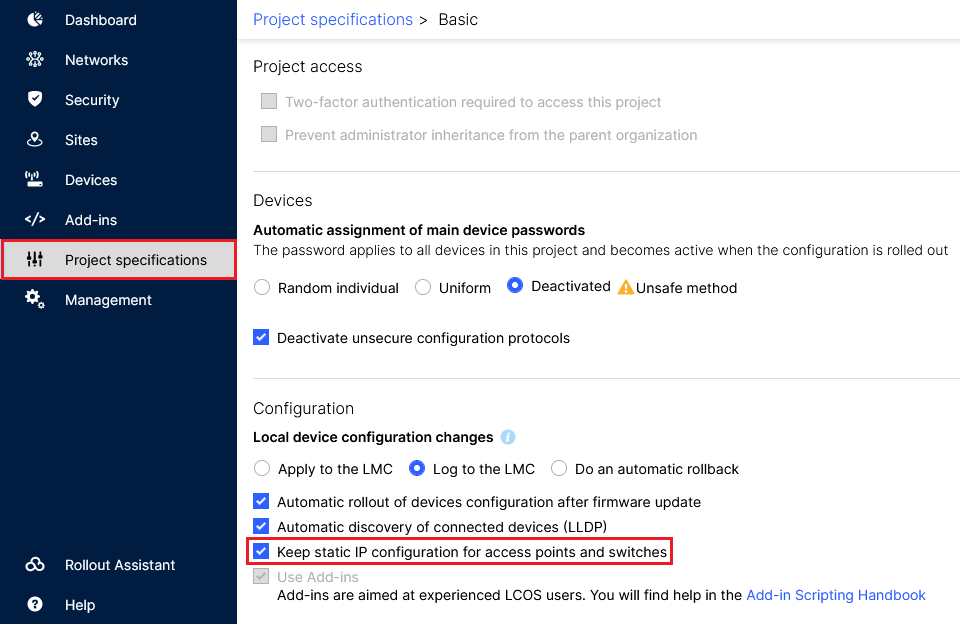
1) Allow static IP configuration for access points and switches:
In the LMC, go to the menu item Project specifications and be sure to activate the option Keep static IP configuration for access points and switches.
2) Configuring the static IP parameters via the access point’s “Detail configuration”:
2.1) Go to the Detail configuration of the access point:
2.1.1) Go to the Devices menu and click the Name of the relevant access point.

2.1.2) Go to the tab Detail configuration.

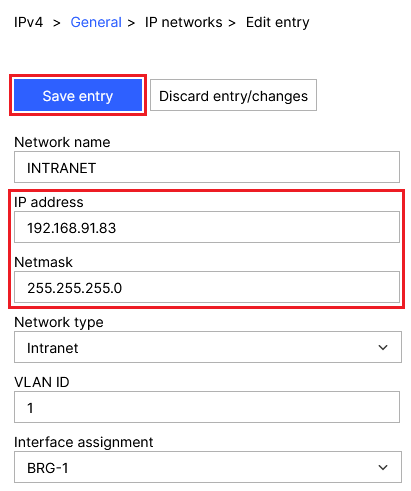
2.2) Setting the IP address and subnet mask:
2.2.1) In the Detail configuration go to the menu IPv4 → General → IP networks.
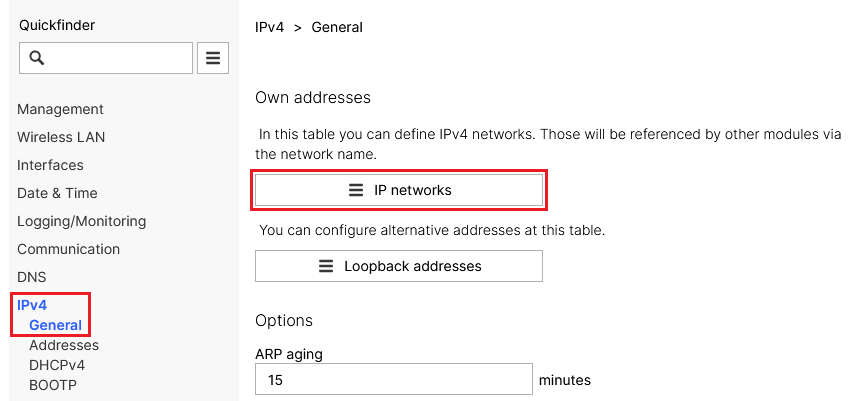
2.2.2) Click the Network name for the relevant network to go to the advanced settings.
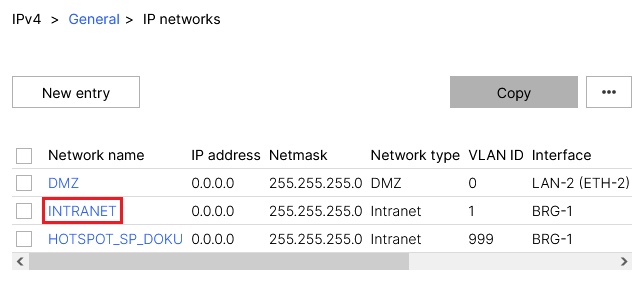
2.2.3) Modify the following parameters and then click Save entry:
- IP address: Enter the IP address the access point should use (in this example 192.168.91.83).
- Netmask: Enter the Netmask for the relevant network (in this example 255.255.255.0).
2.3) Disabling the DHCP server:
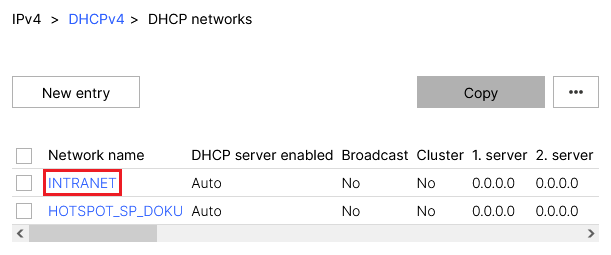
2.3.1) In the Detail configuration go to the menu IPv4 → DHCPv4 → DHCP networks.

2.3.2) Click the network name for the network selected in step 2.2.2 to go to the advanced settings.
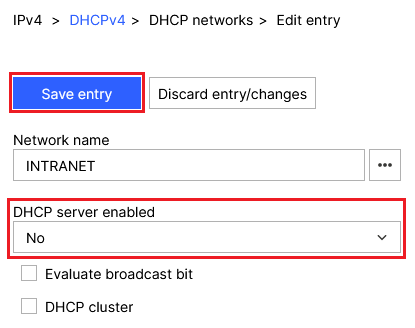
2.3.3) For DHCP server enabled, set the option No and click Save entry.
2.4) Setting a default route:
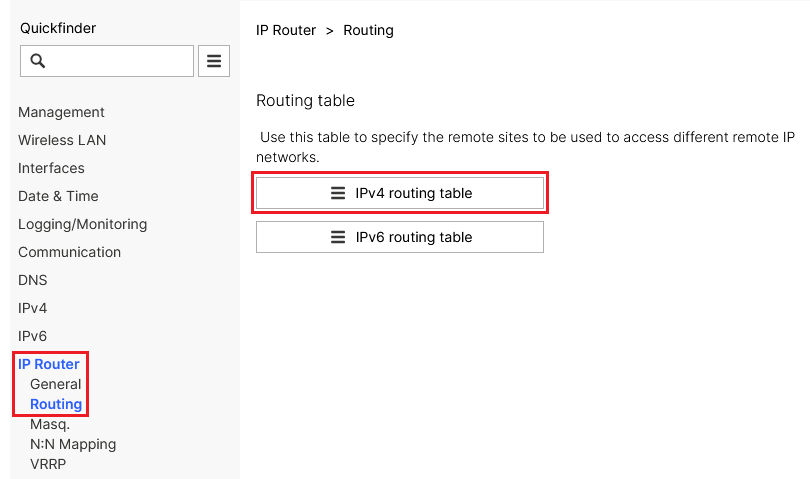
2.4.1) In the Detail configuration, navigate to the menu IP Router → Routing → IPv4 routing table.
2.4.2) Click the New entry button.
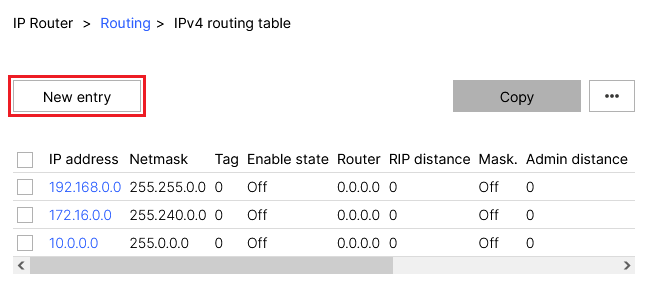
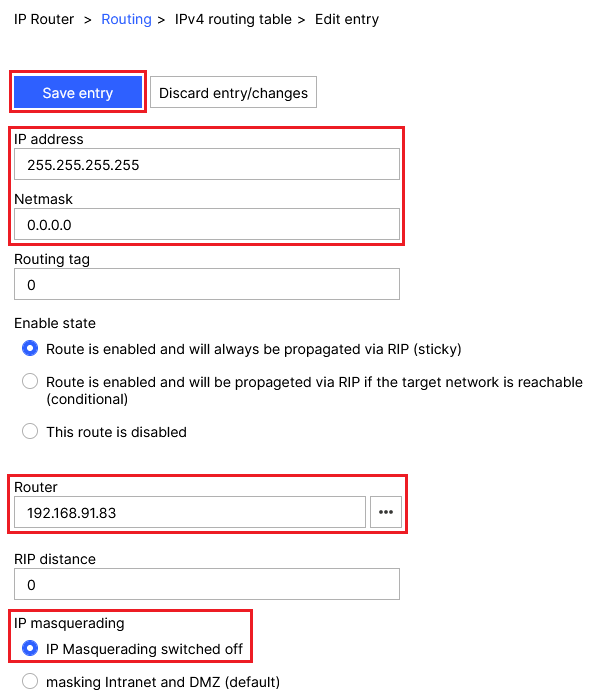
2.4.3) Modify the following parameters and then click Save entry:
- IP address: Enter the IP address 255.255.255.255.
- Netmask: Enter the netmask 0.0.0.0.
- Router: Enter the IP address of the default gateway in the access point’s network (in this example 192.168.91.254).
- IP masquerading: Select the option IP masquerading switched off.
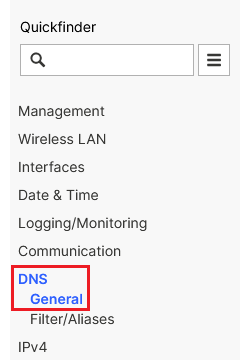
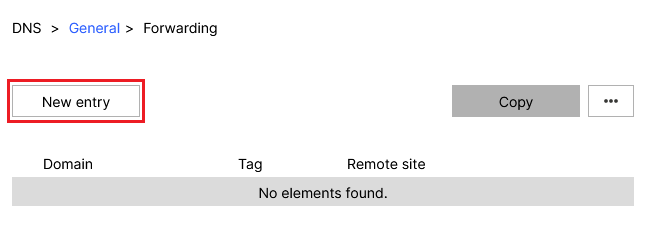
2.5) Setting up DNS forwarding:
2.5.1) In the Detail configuration go to the menu DNS → General.
2.5.2) Scroll to the section Host name resolving and go to the menu Forwarding.
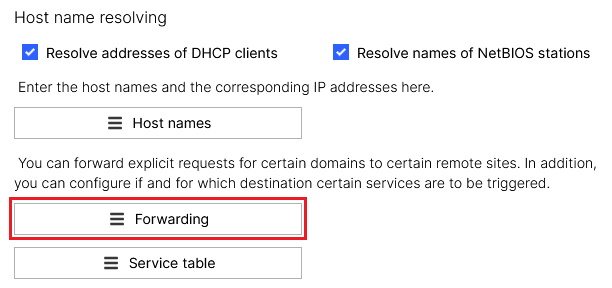
2.5.3 Klicken Sie auf die Schaltfläche New entry.
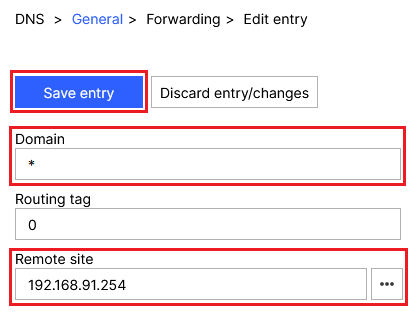
2.5.4) Modify the following parameters and then click Save entry:
- Domain: Enter the wildcard *. This represents any number of characters.
- Remote site: Enter the IP address of a DNS server that should resolve DNS requests from the access point (in this example the IP address of the default gateway 192.168.91.254).
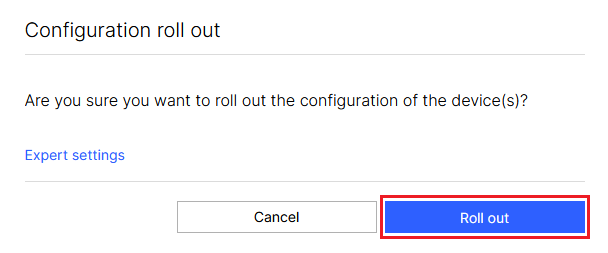
3) Rolling out the configuration to the access point:
3.1) In the LMC, go to the menu Devices and, under Configuration for the relevant access point, click Outdated.

3.2) Finally, implement the changes by clicking Roll out.